Plastering or Painting First? The Right Order for an Auckland Reno
- amigospainters
- Jun 14
- 6 min read
On a reno, plastering comes before painting, every time. The walls get lined and GIB-stopped, the surface is sanded smooth and sealed, then the painting starts. Paint first and you waste money, because plaster dust and sanding ruin a fresh coat. Get the order right and you pay for each job once.

You're mid-reno, the GIB is going up, and you're trying to work out who comes on site first: the plasterer or the painter. It's a fair question, and getting the plastering and painting order wrong is one of the quickest ways to blow your budget on a renovation.
The short version is plaster first, paint second. But there's more to it than that, because the handover between the two trades is where most Auckland renos go sideways. Here's how the order actually works, what each stage costs, and how to keep the two crews from tripping over each other.
Why Does the Plastering and Painting Order Matter So Much?
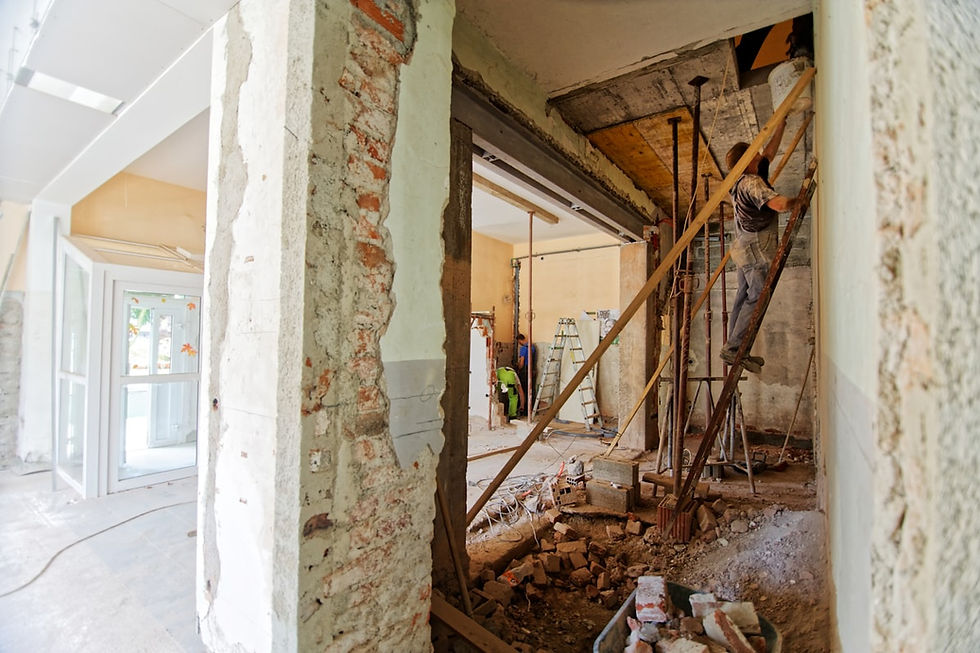
Plastering, or GIB stopping as most people call it here, is a wet, dusty, messy job. The plasterer applies stopping compound over every joint, screw head and patch, lets it dry, then sands it back to a smooth finish. That sanding throws fine white dust over every surface in the room.
If you've already painted, that dust settles into the fresh paint and the sanding scuffs it. You end up cleaning, re-sanding and repainting, which means you pay for the paint job twice. That is the whole reason the plastering and painting order isn't flexible.
The stopping itself isn't where the money leaks. A standard Level 4 GIB stopping finish in Auckland runs around $18 to $30 per square metre, and a premium Level 5 finish sits higher at roughly $28 to $45. The waste shows up later, when a painter has to come back and redo work that was already done.
There's a programme reason too. On a reno you want the messiest, dustiest trades finished and out before the finishing trades arrive. Painting is a finishing trade. Bring the painter in before the plasterer has sanded and you've put a delicate, easily marked surface into a room that's about to get covered in dust. The order isn't just about quality, it's about not paying two crews to work around each other.
What Has to Happen Between Plastering and Painting?
The gap between the two trades is the part people forget. Plastering and painting aren't two jobs that sit next to each other, they're two jobs joined by a handover. Skip a step in that handover and the paint suffers. Here's what needs to happen before a single drop of topcoat goes on:
The plasterer finishes all three stopping coats and sands the walls back to a smooth, even surface.
The room is vacuumed and wiped down so there's no fine dust left clinging to the walls.
Bare GIB and fresh plaster get sealed with a proper primer or sealer, because new board is very porous and drinks paint unevenly.
Every joint and patch gets checked under a bright, raking light to catch sanding marks and low spots before they're painted over.
Only then does the painter start cutting in and rolling the first coat.
Miss the sealing step and you get flashing, where the stopped joints show through as shiny or dull patches against the rest of the wall. If your home is also overdue for a refresh elsewhere, it's worth knowing the signs your Auckland home needs a repaint before the crews pack up and leave.

What's the Right Order for Plastering and Painting on a Reno?
Here's the full sequence on a typical Auckland renovation, from bare framing through to the finished topcoat. Each step has to be signed off before the next one starts.
Framing, plus any wiring or plumbing changes, gets completed and inspected where required.
GIB board is fixed to the walls and ceilings.
GIB stopping, the three-coat plastering process, covers all the joints, screws and patches.
The stopped surface is sanded back to a smooth, even finish.
The room is vacuumed and dusted completely so nothing is left on the walls.
All bare plasterboard and fresh plaster is sealed and primed.
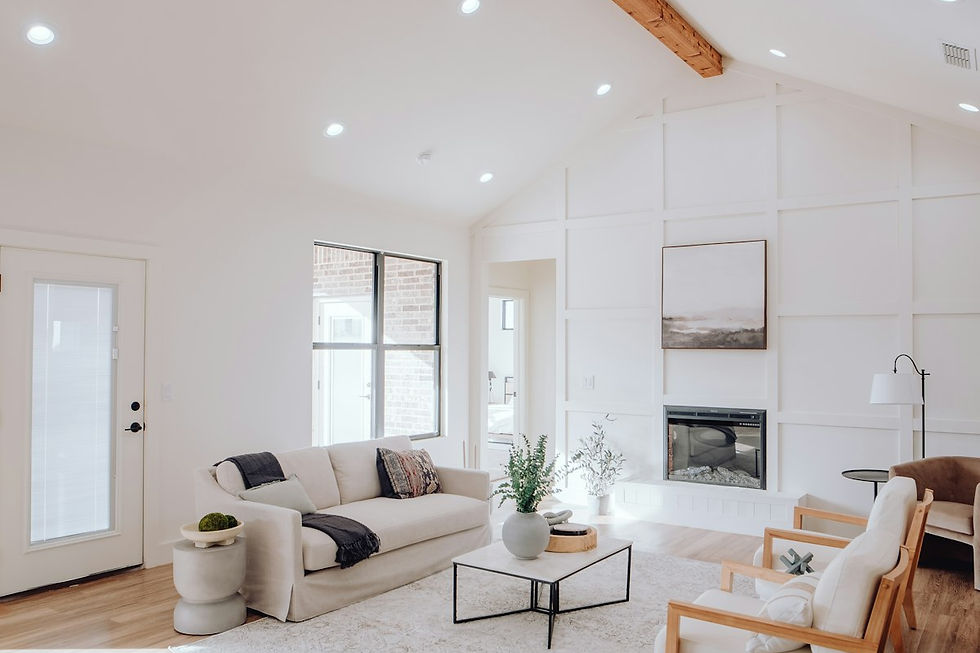
Painting starts: undercoat where it's needed, then two topcoats.
That order holds whether you're doing one room or a whole house. If you want a sense of how the finish levels affect the paint, the GIB guidance on Level 4 and Level 5 finishes is worth a read, and once you reach the colour stage our guide to the best paint colours for Auckland homes will save you some agonising at the paint shop.
Should You Use the Same Company for Plastering and Painting?
You can hire a plasterer and a painter separately, and plenty of people do. But on a reno there's a real argument for getting both stages from one crew, mostly because it removes the weak point in the whole process: the handover.
One point of contact, so there's no finger-pointing if a joint flashes or a patch needs redoing.
The same crew controls its own dust clean-up, sealing and prep, so nothing falls through the gap.
Scheduling is tighter, because one team books both stages back to back instead of waiting on two diaries.
Separate trades can absolutely work when they communicate well. The trouble is that on a busy site, the plasterer and the painter often never actually speak to each other, and that's where the cost creeps in.
If you do split the trades, the simplest safeguard is to agree in writing who's responsible for sealing the walls and clearing the dust. Nine times out of ten the argument is about exactly that, because each crew assumes the other one handled it. Put it on the quote and you've removed most of the risk.
Our Take on Where Renos Go Wrong
The single most common mistake we see isn't a bad plaster job or a sloppy paint job. It's the gap between them. Two separate crews, booked by two different people, with nobody actually owning the handover from one to the next.
What happens is the plasterer finishes and leaves, the painter turns up a day or two later, and the walls were never properly dusted or sealed. The paint goes patchy over the porous stopping, flashing shows around every joint, and the whole lot has to be sanded back and recoated. That's a second paint bill on a job that should have been paid for once.
That's why we quote plastering and painting together, so the handover is ours to own. The walls get sanded, dusted, sealed and checked under light before any topcoat goes near them. It isn't a sales line, it's just the cheapest way to get a wall that still looks right in two years.
Plastering and Painting Order: Frequently Asked Questions
Do you plaster or paint first in a renovation?
Plaster first, then paint. Plastering, or GIB stopping, creates dust and needs sanding, both of which ruin fresh paint. The walls are stopped, sanded, cleaned and sealed before any painting begins.
How long should plaster dry before painting?
Each stopping coat needs to be fully dry before the next, and the finished surface should be completely dry before sealing and painting. Depending on the number of coats, the weather and how well the room is ventilated, that's usually a few days. Rushing it traps moisture and causes problems later.
Do you need to seal new GIB before painting?
Yes. New plasterboard and fresh stopping are very porous and soak up paint unevenly. A sealer or undercoat evens out that porosity so your topcoats go on consistently and the joints don't flash through.
What's the difference between a Level 4 and Level 5 finish?
Level 4 is the standard finish for most NZ homes painted in low-sheen or matt. Level 5 adds a full skim coat over the whole surface and is used for gloss, dark colours or rooms with strong, raking light that shows every imperfection. The GIB finish guidance sets out when each one applies.
Can the same company do both plastering and painting?
Yes, and on a reno it often makes sense. One crew owns the dust control, sealing and handover, so there's no gap for problems to slip through. It's the same logic we apply when preparing a home for sale, where the finish has to be spot on.
How much does GIB stopping cost in Auckland?
As a rough guide, a standard Level 4 GIB stopping finish runs around $18 to $30 per square metre, and a premium Level 5 finish around $28 to $45. Supplying and fixing the board as well pushes the total higher. Prices vary with ceiling height, access and the condition of the framing.
Get Your Plastering and Painting Quoted Together
Amigos Painters covers GIB stopping and painting across Auckland, so the handover between the two stages stays in one set of hands and you only pay for the job once. We'll talk you through the right order for your reno and what finish level suits your rooms.


Comments