)-5.png)
How to Paint Your Front Door for Instant Kerb Appeal
To paint your front door, take it off its hinges or wedge it open, wash it, sand it back, fill any dings, prime bare timber, then lay on two coats of waterborne enamel in a semi gloss or gloss finish. It's a one weekend job and it's the cheapest kerb appeal upgrade you can make.

Your house looks tired from the street and you're not sure where to start. The good news is the highest impact fix is also the smallest one. Painting your front door is a single day of work, costs under 150 dollars in materials, and it changes the whole first impression of the house.
It's the one surface everybody actually stands in front of. Guests, couriers, buyers at an open home. They get up close, and they notice a scuffed, chalky, sun bleached door in a way they never notice a slightly faded wall on the side of the house.
Here's how to paint a front door properly, what paint to use in New Zealand conditions, which colours actually pull their weight, and where DIYers usually go wrong.
Does painting your front door actually add value?
Yes, more than the cost suggests. Kerb appeal work is one of the few improvements where the perceived value jump is bigger than the spend, because buyers make up their minds about a house in the first few seconds.
US research often quoted on this points to homes with black or charcoal front doors selling for around six thousand dollars more than comparable homes with plain white doors, and improved kerb appeal lifting sale prices by several percent on average. Those are overseas figures, so treat them as a direction rather than a promise, but the underlying point holds here too. You can read a summary of that research here.
If you're getting ready to sell, a fresh front door is the cheapest thing on the list. It's usually the first item we suggest when people ask about painting before listing an Auckland home.
What paint should you use on a front door in New Zealand?
Not wall paint. A front door takes sun, rain, salt air, hands, keys and a lot of slamming, so it needs an enamel style finish that cures hard.
The standard choice in New Zealand is a waterborne enamel. Resene Lustacryl gives you a semi gloss and Resene Enamacryl gives you a full gloss. Dulux Aquanamel does the same job. These are water based, low odour, they wash up in water, and unlike the old solvent enamels they don't yellow as they age.
A few things worth knowing before you buy:
Semi gloss is the safe pick. It's forgiving, it wipes clean, and it doesn't shout about every tiny imperfection in the timber.
Full gloss looks sharp on a panelled villa or bungalow door, but it magnifies every bump, brush mark and bit of dust, so your prep has to be spotless.
Skip flat and matte finishes entirely on an exterior door. They mark, they hold dirt, and they don't wash.
If you're going dark, ask for the CoolColour version. Resene CoolColour swaps the heat absorbing black pigment for one that reflects more infrared, which keeps the door cooler and reduces the heat stress that warps and cups timber.
Buy one litre. That's plenty for two coats on a standard door, and a half used tin of enamel just sits in the shed going off.
If you're still torn between finishes, we've broken the whole thing down in our guide to choosing between matte, satin and semi gloss.
How do you paint a front door step by step?
Pick a still, dry day. Paint won't cure properly below about 10 degrees, and a windy day drops grit into your wet enamel. Start early so the second coat is on and touch dry before evening damp settles in.
Take the hardware off. Handle, knocker, letterbox flap, deadbolt. Masking around hardware always looks like masking. Removing it takes ten minutes and it's the single biggest difference between a professional looking door and a DIY one.
Decide whether to lift the door off. Off the hinges and laid flat on trestles is the best result, because gravity works with you instead of pulling drips. Painting it in place on the hinges is faster and perfectly acceptable, just check for runs every few minutes.
Wash it properly. Warm water and sugar soap, top to bottom, then rinse and let it dry completely. Dirt, cobwebs and hand grease will stop your paint sticking, and no amount of good paint fixes a dirty door.
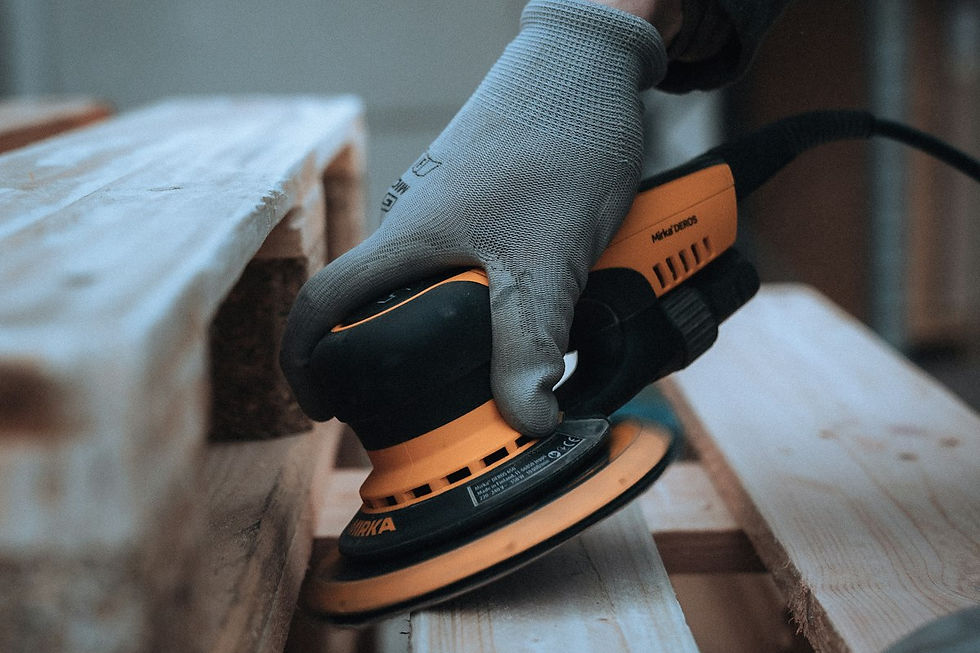
Sand the whole face. Medium grit to knock the gloss off and level any flaking, then a light pass with fine grit. You aren't stripping it back to bare timber, you're giving the new paint something to key into. Dust it off with a damp cloth and let it dry.
Fill and spot prime. Fill dings and old screw holes, sand flush, then prime any bare timber or filler with a quick dry undercoat. Bare patches suck the paint in and flash dull if you skip this.
First coat. Work in order: mouldings and recessed panels first, then the horizontal rails, then the vertical stiles, then the edges. Follow the grain. Lay the paint on and leave it alone, going back over half dry enamel is what causes brush marks.
Light sand, then second coat. Once it's dry, usually two hours for a waterborne enamel, run over it with fine sandpaper, wipe the dust off, and do coat two the same way. Two coats is the minimum on a door, and a third on the sun facing side is not overkill.
Wait before you rehang the hardware. Touch dry is not cured. Give it a full day before screwing handles back on, and a few days before anything presses against it, or you'll leave permanent marks in soft paint.
Resene's own guide walks through the same sequence for exterior doors, and it's worth a read if you want the manufacturer's version: how to paint an exterior door. The prep logic is identical to interior work, which we cover in our guide to filling, sanding and priming before you paint.

Brush, roller or spray for a front door?
For a single door, brush. A quality 50mm angled synthetic brush is all you need, and synthetic bristles are essential with waterborne enamel because natural bristle goes limp in water based paint.
Some people use a small foam or microfibre roller on the flat panels and cut in the mouldings with a brush. That works, and it lays the paint down very evenly, but you have to lightly tip off with the brush straight after or you get a faint orange peel texture.
Brush: best control, best for panelled and villa doors, no masking of surrounds needed.
Roller plus brush: fastest on a flat slab door, slightly textured finish if you don't tip it off.
Spray: a glass smooth finish, but the masking and setup time on one door makes it not worth it unless it's already off its hinges in a garage.
Whatever you use, don't overload it. Enamel wants thin, even coats. Thick coats sag, and a sag on a front door is at eye level forever.
Which front door colours work in New Zealand?
Colour is the whole point of this job, so don't waste the effort on something safe and forgettable. The doors that get noticed are the ones with real contrast against the cladding.
A few combinations that consistently work on New Zealand homes:
Black or near black on a white or light grey weatherboard house. Timeless, sells well, always looks deliberate.
Deep green or forest green on a classic bungalow or villa. Warm, a bit heritage, very hard to get wrong.
Navy on a mid grey or brick facade. Smart without being cold.
Bold red or mustard on a plain white cottage. High risk, high reward, and unforgettable when it lands.
Charcoal on a dark cladding house, with the trim in a lighter tone so the door still reads as an entry rather than disappearing.
One practical rule: test it. Buy a testpot, paint an A4 piece of card, and tape it to the door for two days. Look at it in morning light, in afternoon sun and at dusk. A colour that looks perfect under the fluoro lights of a paint shop can look completely different against your cladding at 6pm.
Our take: what usually goes wrong
Almost every disappointing front door we get called out to has the same story. The paint was fine. The prep wasn't.
The three things that sink a DIY door are skipping the sand, painting hardware that should have been removed, and rushing the second coat onto a first coat that wasn't dry. None of those are skill problems. They're patience problems.
The other one is timing. People do this job in mid winter, in a shaded south facing porch, on a day when it never gets above 12 degrees, and then wonder why the enamel stays soft and picks up marks. If the door won't get a warm, dry, still day, wait for one.
And if the door is genuinely past it, badly weathered, delaminating, or the paint is peeling in sheets, painting over it is throwing money away. That's a strip back or a replacement, and it's worth a second opinion before you spend a weekend on it. Exterior coatings have a real lifespan, which we go into in our piece on how long house paint actually lasts in Auckland.

Painting Your Front Door: Frequently Asked Questions
How long does it take to paint a front door?
A full day, start to finish, for one door. Roughly two hours of washing, sanding, filling and priming, then two coats with a couple of hours drying between them. The paint is touch dry in hours but takes several days to fully cure and harden.
How much does it cost to paint a front door in NZ?
Doing it yourself, expect around 100 to 150 dollars for a litre of quality waterborne enamel, an undercoat, sandpaper and a decent brush. If you're paying a painter, a single door as a standalone job is usually a few hundred dollars, and it's far better value bundled into a larger exterior or interior job.
Can you paint a front door without removing it?
Yes, and most people do. Wedge it open so it can't swing, and paint it upright on its hinges. You just need to check for runs and sags every few minutes, especially along the bottom of the panels and mouldings where paint likes to pool.
Do I need to sand my front door before painting?
Yes. Sanding is not optional on a door. Existing enamel is slick, and new paint has nothing to grip. A quick pass with medium then fine grit is what stops the new coat peeling in sheets in two years.
What paint is best for a wooden front door in New Zealand?
A waterborne enamel in semi gloss or gloss. Resene Lustacryl, Resene Enamacryl and Dulux Aquanamel are the common choices, and they're all low odour, non yellowing and hard wearing. If your door is a dark colour and faces the sun, get the CoolColour version to reduce heat build up. Our guide to paint finishes goes deeper on the sheen question.
Can I paint a dark colour on a door that gets full sun?
You can, but be smart about it. Dark colours absorb a lot of heat, and on a timber door that means expansion, cupping and stress on the coating. Heat reflective options like Resene CoolColour are formulated for exactly this problem and are worth the small extra cost on a north or west facing entry.
Want a front door that looks like a professional did it?
Amigos Painters handles doors, joinery and full exterior repaints across Auckland, and we do the prep properly because that's the part that decides how it looks in five years. If your door is beyond a weekend fix, or you'd rather it just be done right the first time, we'll take a look and tell you honestly what it needs.


Comments